- Details
- Written by: INsane
- Category: NSIS Installers
- Hits: 4955


|
You can test it now but we are not done yet. A "Function" needs to be in the script. Copy all the text in the link for your mod. DoD:s CS:s If your Mod is not one of those two, change to suit!
OK, basically the script will now work if you compile it... One more thing for people who make content for users. The Uninstaller still needs fixing to make it more professional. |
 |
If you make MORE of these installers WITH Un-installers for files that will end up in the dod or cstrike folder a bad thing could occur.
I have found that if you make a uninstaller icon ...you normally, do not make one with the same name. If you do all your different custom content will have the same uninstaller!
Important Note: You can use this... "problem" ...to your advantage :)
This is for future installer packages... but it is good to know right now.
Say you are making lots of maps and you have a beta version, you call the setup file, (see section 3) "Setup dod testmap beta.exe". Then you call the un-installer icon "uninst dod testmap.exe".
What this will do for you is quite good, if all the files are just to be overwritten the old version does not have to be uninstalled first... just run the installer again, the Setup file for the new version can be called "Setup dod testmap V2.exe". Then you call the un-installer icon "uninst dod testmap.exe".
So, the same name can be used for the uninstaller in that case. The entry in the Add/Remove Programs list will now read... dod testmap V2.
It's a handy thing to remember but we don't need it right now... lets continue.
|
In this case we will make it a unique name for the un-installer icon Find this section in your script (around the bottom of the script) ... rename the icon like this.. |
 |
| The first of these is in this same section...
|
 |
|
The last one is in...
(around line 142). ...rename with the same name you used in "Section -Post" |
 |
Now... it is ready to compile a script to make a installer that will...
Find the dod or cstrike folder by searching the users registry, complete the correct folder address for install.
The last step is to compile (this will make a installer package) and run it to test it.
|
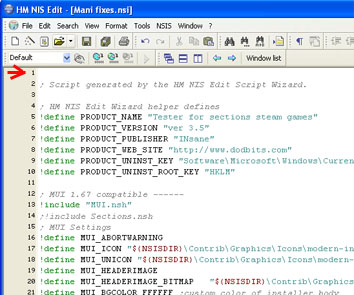
Go to "NSIS" in HM NIS EDIT select "Compile and Run" or use the icon shown in the picture... |
 |
Make sure it finds the dod or cstrike folder, Install it, then check the files are in the right place.
Try the un-installer in the control panel. Make sure all the files go (it may leave empty folders, but no files. This is ok). Make sure the uninstaller icon in the dod directory is also gone.
The installer package will be in the same folder you saved the script in. Its name will be the one you gave it in step 9 of this tutorial.
There is a lot more you can do with NSIS. You may be satisfied with your product like it is, then again you may want to give it some pazazz!
There is customizing the look of the installer, some install options and some handy hints for functions. Lets go on...
Designed by INsane Webmaster - dodbits.com using Template Toaster (Joomla! Version 4)
